The first time I made bunny cookies decorated with royal icing, they looked less like rabbits and more like tiny, frosted potatoes. The dough spread, the ears merged, and the icing ran off the edges. That batch taught me the important part: good results start before the decorating bag comes out. With chilled dough, a sturdy cutter, and icing that flows slowly instead of racing across the cookie, bunny cookies decorated at home become a relaxed Saturday project instead of a flour-covered emergency.
Start with cookies that hold their shape
Use a simple sugar cookie dough with enough flour to support the cutout but not so much that the cookies turn hard. For about 24 medium cookies, cream 1 cup softened unsalted butter with 1 cup granulated sugar for two minutes. Beat in one large egg and 2 teaspoons vanilla. Add 3 cups all-purpose flour, 1 teaspoon baking powder, and one-half teaspoon salt in two additions. Stop mixing as soon as the dough comes together.
Divide the dough into two disks, wrap them, and chill for at least 45 minutes. Roll one disk on a lightly floured counter to about one-quarter inch thick. Thinner cookies can bake crisp and dark around the ears; thicker ones stay softer and give children a sturdier canvas. Cut the shapes, transfer them to parchment-lined baking sheets, and chill the whole sheet for 10 minutes before baking.
Bake at 350 degrees Fahrenheit for 9 to 11 minutes. The centers should look set, while the bottoms are only lightly golden. Do not wait for a deep brown edge. Let the cookies cool on the sheet for five minutes, then move them to a rack. Warm cookies will make even excellent royal icing slide around, so give them at least 45 minutes before decorating.

Make royal icing that behaves
For bunny cookies decorated with clean outlines, I use royal icing made with powdered sugar, meringue powder, and water. Mix 4 cups powdered sugar with 3 tablespoons meringue powder, then add 5 tablespoons water gradually. Beat for about five minutes until the icing is bright white and forms a firm peak. Add water by the quarter teaspoon when thinning it. It is much easier to loosen stiff icing than to rescue a runny bowl.
Separate the icing into small bowls and tint it with gel food coloring. Pastel pink, yellow, blue, and green are easy spring colors, but a small amount of black or brown helps define eyes and whiskers. Cover each bowl with plastic wrap pressed directly onto the surface. Royal icing forms a crust quickly when left uncovered.
For outlining, the icing should hold a ridge for several seconds. For filling, thin a portion until a line drawn through the bowl disappears in about 10 to 15 seconds. That timing is more useful than blindly following a recipe because humidity changes how much water the sugar absorbs. If your filling spreads to the edge before you finish, it is too thin.
A decorating order that saves your patience
First, pipe the outer bunny shape with white or pastel icing. Let that border sit for five minutes. Then fill the body with the same color, using a toothpick to push icing into the corners near the ears. Pop visible air bubbles with the toothpick before the surface begins to set.
Add the inside ears while the base icing is still wet if you want a smooth, slightly blended look. For separate raised details, wait 20 to 30 minutes. Add eyes, a small nose, whiskers, and a collar or bow after the base has formed a skin. Bunny cookies decorated with too many details at once tend to turn muddy, especially when children are helping.
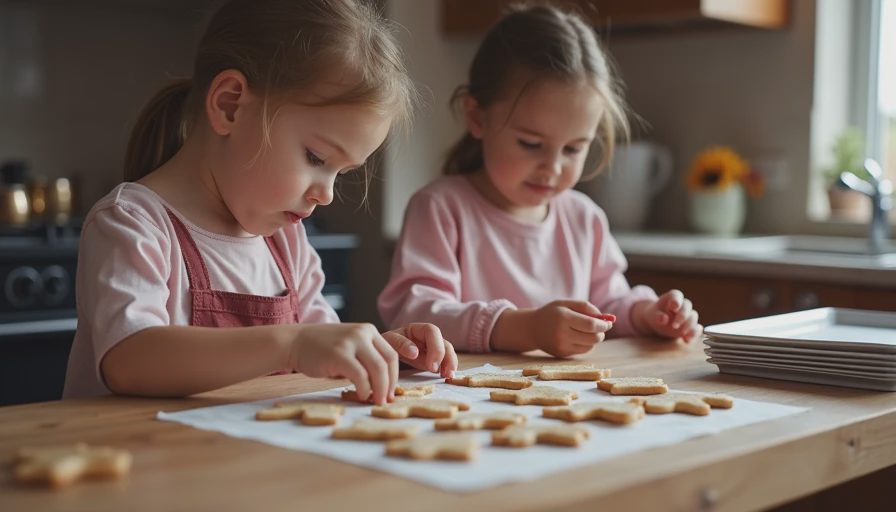
June, my nine-year-old, likes making tiny flower dots, while Sam prefers loading one cookie with every color in the kitchen. I give each kid a tray of fully cooled cookies, a few squeeze bottles, and a sheet of parchment. That keeps the competition over sprinkles away from the finished batch. A toothpick, paper towels, and one empty bowl for used bags are more helpful than a counter crowded with specialty tools.
Simple designs that look better than they sound
A carrot bunny takes less effort than a detailed face. Outline the rabbit in white, flood the body, and add an orange carrot with green leaves once the base dries. For a sleeping bunny, pipe closed eyes and two small pink ear centers. For a meadow design, use green icing at the bottom and add three or four colored dots as flowers.
If your bunny cookies decorated for a party need names, leave the ears plain and write each guest's name across the belly after the base has dried. Use a small round tip or a disposable piping bag with the very end snipped off. Practice on parchment first. The goal is a thin line, not perfect handwriting.
Sprinkles can hide a shaky outline, but add them while the icing is wet so they stick. Avoid large candies on very small cookies; they make the ears heavy and can crack the surface. Sanding sugar, tiny nonpareils, and edible pearls give texture without burying the rabbit.
Drying, storing, and serving
Royal icing needs time. Leave the cookies uncovered for at least six hours, and preferably overnight, before stacking. In a humid kitchen, use a fan on low nearby, not blowing directly across the cookies. If you package them while the icing is soft, bags can leave dull marks and details can smear.
Store the finished cookies in a flat, airtight container with parchment between layers. They keep well for about five to seven days at room temperature. Do not refrigerate them unless you have no other choice; condensation can make the icing sticky. For gifting, place each cookie in a cellophane bag and seal it after the icing is fully dry.
A batch of bunny cookies decorated this way travels well to an Easter brunch, school event, or backyard lunch. I have put them beside a pan of baked beans and watched them disappear before the first slice of brisket. Sweet food does not need an elaborate setup. It needs a reliable base, enough time, and somebody willing to make the first imperfect rabbit.
A practical afternoon schedule
Start the dough after breakfast and chill it while you clean up. Roll, cut, and bake around 10:00 a.m. The cookies can cool while lunch is happening. Mix and tint the icing at noon, then decorate in short rounds rather than trying to finish every cookie in one sitting. Let the base colors dry during a football game or while the kids head outside.
By late afternoon, add the faces and small details. Leave the cookies on the counter overnight, then package them the next morning. This schedule prevents the common mistake of decorating warm cookies at 2:00 p.m. and stacking wet icing before dinner.
If the dough spreads, chill the cut shapes longer. If the icing cracks, the layer was probably too thick or dried too quickly. If the colors bleed, the base was not dry enough. Those are fixable problems, not signs that you need a new mixer. The best bunny cookies decorated at home usually come from slowing down at two points: chill the dough and let the icing dry.
Good smoke. Good sweets. Good people. And, with luck, rabbits that actually look like rabbits.



No notes yet — write the first one.